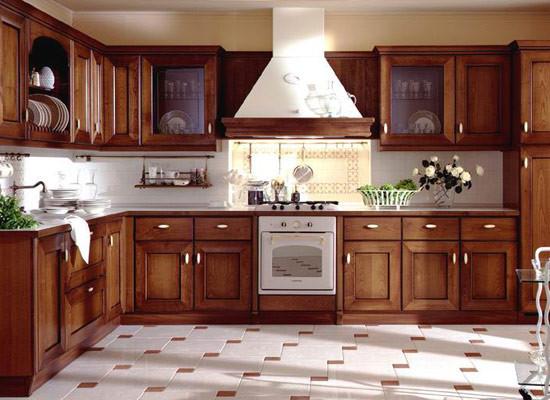
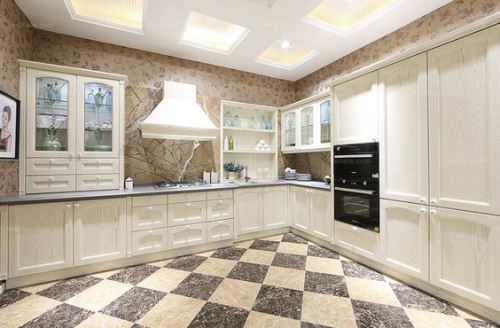
As the saying goes, a three-point product, seven-point installation, is enough to see the importance of the installation process. Whether the cabinet installation is in place not only affects the overall aesthetic effect of the kitchen, but also relates to whether it is convenient to use in the future, so it should not be underestimated. Next, let's take a look at the specific process of cabinet installation.

First, install the cabinet. If the cabinet is L-shaped or U-shaped, the reference point should be found first. The L-shaped cabinet should extend from the right angle to both sides, otherwise it will be easy to have gaps; the U-shaped cabinet should first align the middle one-piece cabinet Then place it from two right angles to the sides to avoid gaps. After the placement is completed, the floor cabinet should be leveled to adjust the level of the cabinet. The cabinets should then be connected. Generally speaking, four connectors are required to connect between the cabinets to ensure the tightness between the cabinets.
Second, install the wall cabinet. First, draw a horizontal line on the wall to ensure the level of the expansion bolt. The distance between the horizontal line and the table is usually 650mm. The user can also make adjustments to the foreman according to the actual situation for future use. When installing the wall cabinet, connect the cabinet with the connecting piece to ensure the cabinet is directly tight. After the cabinet is installed, the level of the cabinet should be adjusted.

Third, install the countertop. After the kitchen is renovated, the original cabinet floor plan size will be inaccurate. In order to reduce the error, the countertop is generally installed after the cabinet and the cabinet are installed for a period of time to ensure the accuracy of the cabinet installation data. Today's cabinet countertops are mostly made of artificial stone or natural stone. Stone countertops are made of stone. Generally, it takes half an hour to bond the countertops in summer and one hour to one and a half hours in winter. glue. The installer should use a sander to polish and polish to ensure the aesthetics of the countertop joints.
Fourth, install hardware. It mainly includes basins, faucets, baskets and other parts. When installing the cabinet, the installation of the water is generally carried out by means of on-site opening. The hole is generally drilled according to the size of the pipe. The hole diameter is generally at least 3-4 mm larger than the pipe. The hole is sealed with a sealing strip to prevent the edge of the wood from seeping. Causes expansion deformation. The connection between the hose and the basin and the hose and sewer should also be sealed with a sealing strip or glass glue to seep water in the water basin or the water.
Fifth, install the stove appliance. To install the embedded electrical appliance, you only need to open the power supply hole in the field. It should be noted that the power supply hole should not be too small, otherwise it will be inconvenient to disassemble in future maintenance. When installing the range hood, pay attention to the distance between the range hood and the cooktop should be 750-800mm. The range hood should be aligned to the left and right of the cooker. The key to the installation of the cooker is to connect the air supply, and it must be ensured that the air inlet does not leak.
Sixth, adjust the cabinet door. When adjusting the door panel, it should be ensured that the gap of the cabinet door is even and horizontal and vertical. The depth of the cabinet is 550mm, and the cabinet is 300mm. It can also be adjusted according to the actual situation.
For the measuring requirement of some industry, Wintape offers long surveyor steel tape measure and the product is available for more length versions. The built-in strong spring enables smooth extension and retraction. The low glare blade makes the number reading clear and it bears measuring units in meters. The stainless steel tape has passed ROHS,En-71 and 6P environmental test. It is green and non-toxic.
Long tape measure can satisfy long distance measuring and industrial measuring. We adopts vinyl coated fiberglass tape, for it is non-stretch and waterproof, which makes it workable in wet condition. The high flexibility of the tape has endowed high accuracy and durability of the product for long time use. ABS plastic case is to protects the retracting spring system and the whole construction. The case can be customized on the color and logo printed as well.
About Material
The tape measure is made of ABS case, PVC coated fiberglass. All the materials are eco-friendly, which pass ROHS and EN-71 tests. The lead content is less than 5ppm.
About Case Color
Standard colors are yellow and blue, yellow styles are in round shape, blue style is in crossing shape.
Other colors can be customized according to pantone code.
About Custom Logo
Custom logo is available.For 1-2colors logo, we will use silk printing
For full color logo, we will print it with heat transfer printing ,
And we also make normal sticker for single color or full color logo
About Tape Colors
Standard tape colors are in white and black.
About Tapeline Size and Measurement
The standard length is 10m/33ft, 30m/99ft, 50m/165ft and100m/328ft
Tape width is 13mm.
Scale Measurement is cm on one side, inch on the other side
100 M Measuring Tapes,Measuring Instruments,Fiberglass Measuring Tapes
Wintape Measuring Tape Company , https://www.wintapetapemeasure.com